Gaming in the Cloud: The Present and the Future of Interactive Entertainment

Introduction

The concept of gaming in the cloud represents a seismic shift from traditional gaming models, offering unprecedented flexibility, scalability, and immersive experiences. We are at the forefront of this technological marvel, enabling gamers to transcend the boundaries of conventional gaming hardware. In this in-depth exploration, we delve into the world of cloud gaming, unraveling its intricacies, benefits, and the transformative impact it’s having on the gaming industry.


1. The Evolution of Gaming

Gaming has come a long way from its humble beginnings. What once required high-end consoles or powerful gaming PCs can now be accessed through the cloud. Cloud gaming leverages powerful servers hosted remotely, enabling gamers to play the latest titles on devices ranging from smartphones and tablets to smart TVs, without the need for expensive hardware upgrades.

2. Breaking the Hardware Barrier

Traditional gaming setups demanded substantial investments in gaming consoles or PCs, often posing a financial hurdle for enthusiasts. Cloud gaming eliminates this barrier by shifting the processing power to remote servers. Gamers can now experience graphics-intensive games in all their glory, regardless of the device they are using, democratizing gaming access for players worldwide.

3. Seamless Access and Cross-Platform Gaming

Cloud gaming platforms provide seamless access to an extensive library of games. Players can start a game on their computer, pause it, and continue from the same point on their smartphone. Moreover, cloud gaming promotes cross-platform play, allowing gamers on different devices to engage in multiplayer experiences together, fostering a truly connected gaming community.

4. Resource Optimization and Environmental Sustainability

By centralizing the computing resources in data centers, cloud gaming optimizes hardware usage. This resource efficiency not only ensures a smooth gaming experience but also contributes to environmental sustainability. With reduced demand for individual gaming consoles, e-waste is minimized, aligning gaming with eco-conscious practices.

5. Overcoming Latency Challenges

One of the significant challenges in cloud gaming is latency, the delay between a player’s action and its response in the game. Cloud providers, including us, employ advanced technologies, such as edge computing and low-latency networks, to minimize these delays. With the continuous evolution of networking infrastructure, latency concerns are becoming increasingly negligible, ensuring a lag-free gaming experience.

6. Enhanced Gaming Experience with AI Integration

Cloud gaming platforms are integrating artificial intelligence (AI) to enhance user experience. AI algorithms predict player behavior, optimize in-game graphics based on device capabilities, and even create personalized game content, delivering tailored experiences to gamers.

7. Future Prospects: VR, AR, and 5G

The future of cloud gaming holds even more exciting prospects. With the advent of 5G networks, latency will be further reduced, opening the door to seamless VR and AR gaming experiences. Cloud-powered VR and AR technologies will immerse players in interactive virtual worlds, revolutionizing storytelling and gameplay mechanics.

8. Gaming Communities and Social Interaction

Cloud gaming doesn’t just enable playing games; it fosters vibrant gaming communities and social interaction. Players from different corners of the world connect, collaborate, and compete, creating a global network of gaming enthusiasts. Online tournaments, live streaming, and collaborative gameplay experiences are shaping a new era of social gaming, where friendships are forged, and rivalries are born.

9. Empowering Indie Developers and Innovation

Cloud gaming democratizes game development by providing a platform for indie developers to showcase their creations. Smaller studios can reach a global audience without the need for extensive marketing budgets, fostering innovation and diverse game genres. This influx of creativity enriches the gaming landscape, offering players a plethora of unique and engaging experiences.

Conclusion

We are not just witnessing the evolution of gaming; we are actively shaping its future. Cloud gaming transcends the boundaries of hardware limitations, making immersive gaming experiences accessible to all. By leveraging our cutting-edge infrastructure, gamers can explore vast virtual worlds, engage in intense multiplayer battles, and embark on epic quests without the constraints of traditional gaming setups.

At our core, we believe in empowering the gaming community, enabling them to embark on limitless adventures in the cloud. As technology continues to advance, our commitment to delivering unparalleled cloud gaming experiences remains unwavering. Together, let’s redefine the way the world plays, one cloud-powered game at a time. Welcome to the future of gaming, welcome to the cloud.

With this comprehensive exploration of cloud gaming, we’ve barely scratched the surface of its immense potential. The cloud gaming landscape is dynamic and ever-changing, with new technologies and innovations continually enhancing the gaming experience. As a cloud provider committed to delivering cutting-edge solutions, we are excited to be a part of this journey, propelling the gaming industry into a future where creativity knows no bounds and players can truly game without limits.

Through cloud gaming, the world of interactive entertainment has become boundless, allowing gamers to explore, connect, and compete in ways previously unimaginable. As we continue to evolve and adapt to the demands of this digital age, cloud gaming will remain at the forefront, empowering players and developers alike to redefine the very essence of gaming. Embrace the future, embrace the cloud, and let the games begin.

Getting started: AI and GPUs in the Cloud

Introduction

In today’s fast-changing tech world, two powerful forces are reshaping our lives: Artificial Intelligence (AI) and Graphics Processing Units (GPUs). Let’s have a look on the basics of AI, GPUs, and how they team up with the cloud to create amazing possibilities.

Demystifying AI: Computers with Brains

Artificial Intelligence, or AI, is about making computers think like us humans. Think of it as the magic behind your phone recognizing your voice or suggesting what to watch. AI uses smart computer tricks to learn from information and make smart decisions.


1. AI and the Cloud: A Perfect Team

Imagine the cloud as a super-smart computer that lives on the internet. It’s where companies and people store information and use really strong computers for hard tasks. AI needs lots of power to learn from big piles of information. The cloud gives this power, letting AI learn and make smart guesses quickly.

The cloud is like magic for AI because it can grow when needed. As AI tasks get tougher, the cloud can add more power to handle the work. This means AI can learn from enormous amounts of information in new and impressive ways. This superpower of cloud computing helps AI do amazing things like predicting diseases and understanding the weather.

2. Powerful GPUs: AI’s Secret Weapon

Graphics Processing Units, or GPUs, were made to make video games look awesome. But guess what? They’re also perfect for AI. GPUs are like super-fast math experts that can solve many problems together. Since AI is all about math, GPUs make AI learning faster.

The cool thing about GPUs is how they do math. They break tasks into small pieces and solve them all at once. This makes AI learning super speedy. As AI gets more complicated, GPUs become even more helpful. They help scientists and computer whizzes push the limits of what AI can do.

3. GPUs in the Cloud: Supercharging AI

When AI and the cloud team up, it’s like giving AI a turbo boost. Cloud companies offer GPUs that anyone can use online. This means you don’t need to buy an expensive GPU – you can rent one on the cloud. It’s like borrowing a super-fast brain for your AI tasks.

Cloud-based GPUs are great because they’re easy to use. Students, researchers, and AI fans who don’t have fancy equipment can still use GPUs through the cloud. This makes learning about AI fair for everyone. From trying out AI tricks to running tough simulations, cloud-based GPUs let people explore AI without worrying about expensive machines.

Exploring Cloud AI: Your Learning Playground

Learning about AI and GPUs in the cloud is like opening a door to new adventures:

1. Easy Access: Cloud services let you use GPUs without owning one. It’s like having a strong tool ready whenever you want.

2. Learning Safely: You can experiment with AI in a safe space on the cloud. It’s like playing in a sandbox without breaking anything.

3. Working Together: Cloud platforms let people from different places work on AI projects together. It’s like having a virtual classroom where you learn from others and share ideas.

4. Trying Different Tools: Cloud services have many tools for AI. It’s like having a big toolbox to choose the right tool for the job.

Conclusion

AI and GPUs are a dynamic duo changing how computers work. The cloud gives them a home and superpowers. Learning more about AI and GPUs in the cloud opens the door to endless exciting possibilities.

How Blockchain in the Cloud is Shaping the Digital Future

Introduction

Blockchain technology has gained immense popularity in recent years, primarily due to its applications in cryptocurrencies like Bitcoin. However, its potential extends far beyond digital currencies. When combined with cloud computing, blockchain can revolutionize various industries by enhancing security, transparency, and efficiency. In this comprehensive article, we will explore how blockchain technology is reshaping the digital landscape when integrated with cloud computing.


Understanding Blockchain Technology

Before exploring the synergy between blockchain and the cloud, let’s briefly understand what blockchain technology is.

At its core, a blockchain is a decentralized and distributed ledger that records transactions across multiple computers in a way that ensures their immutability and security. Each block in the chain contains a set of transactions, and these blocks are linked together in chronological order, forming a chain. Once a block is added to the chain, it becomes nearly impossible to alter previous transactions, making the blockchain a tamper-resistant and transparent ledger.

Key characteristics of blockchain technology include:

  1. Decentralization: No single entity has control over the entire blockchain network, enhancing its security and resilience.
  2. Transparency: All transactions on the blockchain are visible to network participants, ensuring trust and accountability.
  3. Immutability: Once data is recorded on the blockchain, it cannot be changed or deleted.
  4. Security: Advanced cryptographic techniques protect data on the blockchain, making it highly secure.

The Role of Cloud Computing

Cloud computing involves the delivery of computing services, including storage, processing power, and software, over the internet. MomentumX.Cloud offers scalable and flexible infrastructure that enables businesses to reduce costs and increase efficiency. The cloud’s features, such as on-demand resources and rapid scalability, have made it a fundamental component of modern IT infrastructure.

Blockchain and Cloud Computing Integration

Integrating blockchain technology with cloud computing can result in a powerful combination that offers several advantages:

  1. Scalability: Blockchain networks can become resource-intensive as they grow. Cloud computing provides the necessary scalability to handle increased workloads efficiently. Cloud-based blockchain solutions can dynamically allocate resources to match demand.
  2. Cost-Efficiency: Building and maintaining a blockchain network can be costly. MomentumX.Cloud offers pay-as-you-go pricing models, reducing the upfront investment required to deploy and manage blockchain networks.
  3. Accessibility: Cloud-based blockchain solutions are accessible from anywhere with an internet connection. This accessibility is essential for organizations with remote teams or international operations.
  4. Rapid Deployment: Cloud-based blockchain platforms often come with preconfigured settings and templates, enabling rapid deployment and reducing the time needed to set up a blockchain network.
  5. Security and Reliability: MomentumX.Cloud invest heavily in security measures, ensuring the protection of data and resources. These security features complement the inherent security of blockchain technology.

Use Cases of Blockchain on the Cloud

The integration of blockchain and cloud computing is opening up new possibilities across various industries. Here are some prominent use cases:

  1. Supply Chain Management

Blockchain on the cloud can revolutionize supply chain management by providing real-time visibility and transparency into the movement of goods. Each transaction or movement of goods can be recorded on the blockchain, enabling stakeholders to track products from the source to the consumer. This can help reduce fraud, ensure product authenticity, and optimize supply chain operations.

  1. Healthcare

In the healthcare sector, blockchain on the cloud can securely store and share patient records, ensuring data integrity and privacy. Patients can have more control over their health data, granting access only to authorized healthcare providers. Additionally, clinical trials and pharmaceutical supply chains can benefit from blockchain’s transparency and traceability.

  1. Financial Services

Blockchain technology is already disrupting the financial industry, and the cloud enhances its capabilities. Cloud-based blockchain solutions enable financial institutions to settle transactions more quickly, securely, and cost-effectively. It can also facilitate cross-border payments and remittances while complying with regulatory requirements.

  1. Identity Verification

Blockchain on the cloud can provide a secure and immutable identity verification system. Individuals can control their digital identities and share them with third parties as needed, reducing the risk of identity theft and fraud.

  1. Smart Contracts

Smart contracts are self-executing agreements with the terms of the contract directly written into code. Blockchain on the cloud can support smart contract platforms, making it easier to deploy and manage smart contracts for various applications, from insurance to real estate.

Challenges and Considerations

While the integration of blockchain and cloud computing offers significant benefits, there are challenges and considerations to keep in mind:

  1. Security Concerns: Despite the inherent security of blockchain, vulnerabilities can exist in the cloud infrastructure or the applications built on top of it. Robust security measures are essential to protect against data breaches.
  2. Regulatory Compliance: Depending on the industry and location, there may be regulatory requirements governing the use of blockchain technology and cloud computing. It’s crucial to navigate these regulations effectively.
  3. Interoperability: Ensuring compatibility between different blockchain platforms and cloud providers can be challenging. Interoperability standards are still evolving.
  4. Scalability: As blockchain networks grow, they can strain cloud resources. Proper resource allocation and management are critical to maintaining performance.

Conclusion

The integration of blockchain technology with cloud computing is poised to reshape various industries by enhancing security, transparency, and efficiency. While challenges exist, the benefits of this synergy are substantial, offering cost-effective scalability and rapid deployment of blockchain solutions.

As blockchain continues to evolve and find new applications, its partnership with cloud computing will likely play a pivotal role in driving innovation and transforming how businesses and organizations operate in the digital age. With the right strategy and careful consideration of security and compliance, blockchain on the cloud can unlock new possibilities and revolutionize industries worldwide. This dynamic combination holds the potential to create a more secure, transparent, and efficient digital landscape for the future.

How to Configure Nginx on Ubuntu 23.04

Introduction

Configuring Nginx on Ubuntu 23.04 is a vital skill for anyone looking to set up a web server. Nginx is renowned for its efficiency, speed, and versatility. In this comprehensive guide, we will take you through the process of configuring Nginx. This guide is designed to be straightforward, even if you’re new to web server administration.

Why Nginx on Ubuntu 23.04?

Ubuntu 23.04 is a robust platform for hosting web services, and Nginx complements it perfectly. Nginx is fast, efficient, and capable of handling numerous concurrent connections. Whether you’re running a personal blog, an e-commerce site, or a complex web application, Nginx on Ubuntu 23.04 offers the performance, security, and flexibility you need.


Step 1: Installation

Your journey begins with the installation of Nginx on your Ubuntu 23.04 server. Open a terminal and execute the following commands:


sudo apt update
sudo apt install nginx

Nginx should start automatically once the installation is complete. You can confirm its status with:

sudo systemctl status nginx


Step 2: Basic Server Testing

After installation, it’s a good practice to perform a basic test to ensure that Nginx is functioning correctly. Open a web browser and enter your server’s IP address or domain name. You should see the default Nginx welcome page.

This confirms that your Nginx web server is up and running.

Step 3: Server Block Configuration

In most cases, you’ll want to host multiple websites or applications on a single server. To achieve this, you’ll configure server blocks in Nginx (similar to virtual hosts in Apache) to route incoming requests to the appropriate site or application.

Configuring Nginx Server Blocks:

Begin by creating a new server block configuration file for each site or application you want to host. These files are typically stored in the /etc/nginx/sites-available/ directory. Here’s an example of creating a server block file:


sudo nano /etc/nginx/sites-available/example.com

Inside the file, configure the server block. Here’s a basic example:

 
server {
    listen 80;
    server_name example.com www.example.com;
    root /var/www/html/example;
    index index.html;

    location / {
        try_files $uri $uri/ =404;
    }
}
 

After creating the server block configuration, create a symbolic link to enable it and test the configuration:

 
sudo ln -s /etc/nginx/sites-available/example.com /etc/nginx/sites-enabled/
sudo nginx -t
sudo systemctl restart nginx
 

Step 4: Website Deployment and Configuration

With your server blocks set up, you can now deploy your website or web application to the appropriate document root directory specified in your server block configuration. Additionally, you may need to configure database connections, content management systems, or application settings depending on your specific use case.

Step 5: Domain Configuration

If you have a domain name, you’ll need to configure its DNS settings to point to your server’s IP address. This is typically done through your domain registrar’s control panel. Ensure that your domain name resolves to your server’s IP address to allow incoming web traffic.

Step 6: SSL/TLS Configuration (Optional)

For enhanced security, consider configuring SSL/TLS certificates to enable encrypted connections (HTTPS). While this step is optional, it’s highly recommended, especially for e-commerce sites and applications that handle sensitive data.

You can obtain free SSL/TLS certificates from Let’s Encrypt and configure Nginx to use them. Detailed instructions for setting up Let’s Encrypt can be found in the official documentation.

Conclusion

Configuring Nginx on Ubuntu 23.04 empowers you to host websites, applications, and services with speed and efficiency. By mastering Nginx configuration, you can confidently create and manage your web hosting environment, ensuring the reliability, security, and performance of your online services.

Nginx’s reputation for speed and versatility, combined with Ubuntu 23.04’s reliability, makes this combination an excellent choice for various web hosting scenarios. Whether you’re a seasoned web administrator or just starting, this guide equips you with the skills needed to set up a powerful web server.

How to Configure OpenVPN: Your Path to Secure Communication

Introduction

Whether you’re an individual looking to safeguard your personal information or a business aiming to protect sensitive data, having a reliable and secure virtual private network (VPN) is essential. OpenVPN is an open-source VPN solution that is known for its robust security and versatility. In this comprehensive guide, we will walk you through the process of configuring OpenVPN, enabling you to establish a secure and private network connection.

What is OpenVPN?

OpenVPN is an open-source software application that implements virtual private network (VPN) techniques to create secure point-to-point or site-to-site connections in routed or bridged configurations and remote access facilities. It uses a custom security protocol that utilizes SSL/TLS for key exchange, making it highly secure and adaptable for various network configurations.

Prerequisites

Before diving into OpenVPN configuration, you should have the following prerequisites in place:

  1. A Server: You need a server to host your OpenVPN. This server should have a static IP address and sufficient resources to handle the VPN traffic.

  2. Operating System: OpenVPN can be installed on various operating systems, including Linux, Windows, and macOS. Ensure your server is running one of these compatible systems.

  3. Root Access (Linux): If you’re using Linux, make sure you have root access or sudo privileges to install and configure OpenVPN.

  4. OpenVPN Software: Download and install the OpenVPN software on both the server and client devices. You can find installation packages for different platforms on the official OpenVPN website.

Steps to Configure OpenVPN

Step 1: Installation

The first step is to install OpenVPN on your server and client devices. The installation process may vary depending on your operating system. For example, on Ubuntu, you can use the following command to install OpenVPN:

sudo apt-get install openvpn

Step 2: Create Server and Client Certificates

OpenVPN uses certificates for authentication. You’ll need to create certificates for both the server and client devices. You can use the easy-rsa script that comes with OpenVPN to generate these certificates. Follow the steps provided in the official OpenVPN documentation to create the necessary certificates.

Step 3: Configuration Files

OpenVPN uses configuration files to set up the VPN connection. You’ll need to create separate configuration files for the server and each client. These files typically have a .conf extension. Here’s an example of a basic server configuration file (server.conf):

port 1194
proto udp
dev tun
ca ca.crt
cert server.crt
key server.key
dh dh.pem
server 10.8.0.0 255.255.255.0
ifconfig-pool-persist ipp.txt
push "redirect-gateway def1 bypass-dhcp"
push "dhcp-option DNS 8.8.8.8"
push "dhcp-option DNS 8.8.4.4"
keepalive 10 120
cipher AES-256-CBC
comp-lzo
user nobody
group nogroup
persist-key
persist-tun
status openvpn-status.log
verb 3

For the client configuration file (client.conf), you’ll need to specify the server’s IP address, the client’s certificate, and the client’s private key.

Step 4: Firewall Configuration

To allow OpenVPN traffic through your server’s firewall, you’ll need to configure firewall rules. The specific rules may vary depending on your server’s operating system and firewall software. Make sure to allow traffic on the OpenVPN port (default is 1194) and the tunnel interface (usually tun0).

Step 5: Start the OpenVPN Service

Once your configuration files are in place and your firewall is configured, start the OpenVPN service on your server using the following command:

sudo systemctl start openvpn@server

Step 6: Client Setup

On the client devices, you’ll need to install the OpenVPN software and import the client configuration file (client.conf). You can typically do this through the OpenVPN client’s graphical interface or by copying the configuration file to the appropriate directory.

Step 7: Connect to the VPN

With the OpenVPN client installed and the configuration file imported, you can now connect to your VPN server. You’ll be prompted to enter your username and password, and upon successful authentication, your VPN connection will be established.

Advanced OpenVPN Configuration

While the above steps provide a basic configuration for OpenVPN, there are many advanced options and features that you can explore to tailor your VPN setup to your specific needs. Here are some advanced topics to consider:

1. Two-Factor Authentication (2FA)

Enhance the security of your VPN by implementing two-factor authentication. This requires users to provide a second form of verification, such as a one-time code from a mobile app, in addition to their username and password.

2. Routing and Access Control

You can control which clients can access specific resources on your network by configuring routing and access control rules in your OpenVPN server’s configuration.

3. Logging and Monitoring

Implement robust logging and monitoring to keep track of VPN activity and diagnose any issues that may arise.

4. Load Balancing and Redundancy

For high availability and load balancing, you can set up multiple OpenVPN servers and distribute client connections among them.

5. Client Customization

Customize the client configuration files to include specific settings, such as route additions, DNS options, and custom scripts.

Conclusion

Configuring OpenVPN might seem like a complex process, but with careful attention to detail and the right resources, it becomes manageable. OpenVPN offers a high level of security, making it an excellent choice for anyone concerned about online privacy and data protection.

Remember that this guide provides a basic overview of the OpenVPN configuration process. Depending on your specific use case and network setup, you may need to delve deeper into OpenVPN’s advanced features and options. Always refer to the official OpenVPN documentation and seek expert advice if necessary to ensure the highest level of security and performance for your VPN setup. Once configured, you can enjoy the benefits of a secure and private network connection for all your online activities.

By following the steps outlined in this guide, you can establish a robust and secure OpenVPN network that protects your data and privacy, whether you’re an individual user or a business looking to safeguard sensitive information. Stay safe and connected in the digital world with OpenVPN.

How to Configure a Web Server on Your VPS

Introduction

Setting up a web server on a Virtual Private Server (VPS) is a valuable skill for anyone looking to host a website, web application, or personal blog. This guide aims to provide you with step-by-step instructions for configuring a web server on a VPS using Ubuntu Server and the Apache web server. Whether you’re a beginner or have some experience, this guide will help you get a web server up and running on your VPS.


Step 1: Connect to Your VPS

To configure your VPS, you’ll need to connect to it via SSH (Secure Shell). Most VPS providers offer web-based SSH access or provide SSH credentials (username and password). Use a terminal application or SSH client to establish a connection to your VPS:

ssh username@your_vps_ip

Once connected, you’ll have command-line access to your VPS, allowing you to manage it remotely.

Step 2: Update and Upgrade

Keeping your server up-to-date is crucial for security and stability. Run the following commands to update the package list and upgrade existing packages:

sudo apt update
sudo apt upgrade

This ensures that your server is equipped with the latest security patches and software updates.

Step 3: Install Apache Web Server

Apache is a popular choice for hosting websites. Install it with the following command:

sudo apt install apache2

The Apache web server is now installed on your VPS and ready to serve web content.

Step 4: Configure Firewall Rules

To allow web traffic to reach your server while maintaining security, configure your server’s firewall. On Ubuntu, Uncomplicated Firewall (UFW) is commonly used. Open port 80 (HTTP) and, if needed, port 443 (HTTPS):

sudo ufw allow 80/tcp
sudo ufw allow 443/tcp
sudo ufw enable

These rules will ensure that your server can accept web traffic securely while blocking unauthorized access.

Step 5: Test Apache

After installing Apache and configuring the firewall, it’s essential to verify that the web server is running. Open your VPS’s public IP address in a web browser; you should see the default Apache page, confirming that your web server is operational.

Step 6: Add Your Website Files

To host a website or web application, place your files in the appropriate directory. By default, Apache serves content from /var/www/html/. You can upload your files using SCP, SFTP, or your preferred method. Organize your website files within this directory to ensure they are accessible via the web.

Step 7: Configure Virtual Hosts (Optional)

If you plan to host multiple websites on your VPS, consider setting up Apache virtual hosts. This allows you to host multiple domains or subdomains on the same server. Create a virtual host configuration file for each site in the /etc/apache2/sites-available/ directory. Configure the virtual hosts to point to the respective website directories.

Step 8: Secure Your Server

Security is paramount when running a web server. Implement these best practices to protect your server and data:

  • Regular Updates: Continuously update your server and software to patch vulnerabilities and ensure optimal performance.

  • Authentication: Use strong passwords or SSH keys for authentication to prevent unauthorized access.

  • Firewall Rules: Set up a firewall to restrict access to only necessary ports, reducing exposure to potential threats.

  • HTTPS Encryption: Enable HTTPS with an SSL/TLS certificate to encrypt data transmitted between your server and users’ browsers. This enhances security and user trust.

  • Monitoring: Regularly monitor server logs for suspicious activity and consider implementing intrusion detection systems if necessary. Utilize server monitoring tools to track resource usage and performance.

Additional Tips and Best Practices

Now that you have a functioning web server, here are some additional tips and best practices to enhance your VPS hosting experience:

  1. Regular Backups: Implement a backup strategy to safeguard your data. Consider automated backups and offsite storage to recover from unexpected data loss or server issues.

  2. Performance Optimization: Optimize your web server’s performance by configuring Apache’s settings, utilizing caching mechanisms, and minimizing resource-heavy scripts.

  3. Content Management Systems (CMS): If you plan to use a Content Management System (CMS) like WordPress, Joomla, or Drupal, follow their installation and security guidelines. Regularly update your CMS and plugins to patch vulnerabilities.

  4. Database Setup: If your website requires a database, install and configure MySQL or PostgreSQL, and ensure proper security measures are in place. Regularly back up your databases to prevent data loss.

  5. Email Configuration: Set up email services or integrate with third-party email providers for effective communication with your users. Ensure proper email security and spam protection.

  6. Scaling Resources: As your website grows, consider scaling your VPS resources, such as CPU, RAM, and storage, to accommodate increased traffic and resource demands.

  7. Community Support: Engage with online communities, forums, or support channels to seek help and share knowledge with other VPS users. Collaborative learning can be invaluable.

Conclusion

Setting up a web server on your VPS can be a rewarding experience, whether you’re hosting a personal blog, a portfolio website, or a complex web application. This comprehensive guide has provided you with the essential steps to configure and manage your web server effectively.

By following these steps and implementing additional tips and best practices, you’ll not only have a functioning web server but also a well-optimized and secure hosting environment for your online projects. As you gain experience and continue to explore, you’ll unlock the full potential of your VPS hosting, ensuring the success of your online ventures. With dedication and continuous learning, you’ll master the art of VPS web hosting and take full advantage of this powerful platform.

How to Protect your Windows VPS with Microsoft Defender Antivirus

Introduction

Securing your Virtual Private Server (VPS) is paramount in today’s digital landscape. With cyber threats evolving at an alarming rate, ensuring the safety of your VPS is crucial for safeguarding your data and maintaining uninterrupted services. While there are various security measures available, one often overlooked but effective option is Windows Defender, the built-in antivirus and anti-malware solution from Microsoft. In this article, we’ll explore how you can harness the power of Windows Defender to protect your VPS comprehensively.

Understanding Windows Defender

Before diving into the steps to secure your VPS with Windows Defender, it’s essential to understand what Windows Defender is and what it can do for your server.


1.1 What is Windows Defender?

Windows Defender is a free antivirus and anti-malware tool that comes pre-installed with Windows operating systems, including Windows Server editions. It provides real-time protection against viruses, malware, spyware, and other malicious software that can compromise your server’s security.

1.2 Features of Windows Defender

Windows Defender boasts several key features that make it a valuable tool for VPS security:

  • Real-time protection: Windows Defender constantly scans your VPS for threats, ensuring that any potential risks are detected and addressed promptly.
  • Regular updates: Microsoft regularly releases updates and definitions to keep Windows Defender up-to-date with the latest threats.
  • Firewall integration: Windows Defender works seamlessly with the Windows Firewall to provide a robust defense against network-based threats.
  • Cloud-based protection: It leverages cloud-based threat detection to enhance its ability to identify and respond to emerging threats.
  • Centralized management: You can manage Windows Defender settings centrally across multiple servers using the Windows Security Center.

Preparing Your VPS

Before you start using Windows Defender to protect your VPS, you need to ensure that your server is correctly configured and up to date.

2.1 Keep Your Server Updated

Regularly update your VPS with the latest security patches and updates from Microsoft. This will not only improve overall server security but also ensure that Windows Defender has the latest virus definitions to effectively protect your system.

2.2 Enable Windows Defender

In some cases, Windows Defender may not be enabled by default. To enable it, follow these steps:

  • Go to the “Server Manager” on your VPS.
  • Select “Add roles and features” and follow the wizard.
  • Check the “Windows Defender Antivirus” option during the installation.

Configuring Windows Defender

Now that Windows Defender is enabled on your VPS, it’s time to configure it for maximum protection.

3.1 Regular Scans

Set up regular scans on your server. You can schedule full or quick scans as per your requirements. To configure scheduled scans:

  • Open Windows Security on your server.
  • Click on “Virus & threat protection.”
  • Under “Scan options,” select “Quick scan” or “Full scan.”
  • Click “Manage schedules” and configure the scan frequency and timing.

3.2 Real-time Protection

Ensure that real-time protection is enabled to prevent threats from infiltrating your VPS in real-time:

  • Open Windows Security.
  • Click on “Virus & threat protection.”
  • Toggle the “Real-time protection” switch to the “On” position.

3.3 Automatic Sample Submission

Enabling automatic sample submission helps Microsoft improve Windows Defender and respond to new threats more effectively:

  • Open Windows Security.
  • Click on “Virus & threat protection.”
  • Scroll down and toggle the “Automatic sample submission” switch to the “On” position.

Customizing Protection

Windows Defender allows you to customize its protection settings to suit your specific needs.

4.1 Exclusions

You can exclude certain files, folders, or processes from being scanned if they are known to be safe. This can improve server performance and prevent false positives. To set exclusions:

  • Open Windows Security.
  • Click on “Virus & threat protection.”
  • Under “Exclusions,” click “Add or remove exclusions.”

4.2 Controlled Folder Access

Controlled Folder Access is a security feature that protects specific folders from unauthorized changes. To enable it:

  • Open Windows Security.
  • Click on “Virus & threat protection.”
  • Scroll down to “Ransomware protection” and click “Manage ransomware protection.”
  • Toggle “Controlled folder access” to the “On” position and configure protected folders.

Monitoring and Responding to Threats

To effectively protect your VPS, you need to stay vigilant and monitor Windows Defender for any detected threats.

5.1 Threat History

Check the Threat History regularly to review detected threats and take appropriate action. You can access the Threat History from Windows Security.

5.2 Quarantine and Remediation

When threats are detected, Windows Defender automatically quarantines them. You can review and remediate threats from within Windows Security.

5.3 Advanced Threat Protection

Consider using Microsoft Defender Advanced Threat Protection (ATP) for enhanced security. ATP offers advanced threat detection and response capabilities, including threat analytics and sandboxing.

Additional Security Measures

While Windows Defender provides robust protection, it should be part of a layered security strategy. Here are some additional security measures to consider:

6.1 Use a Firewall

In addition to the built-in Windows Firewall, consider using a third-party firewall solution to further secure your VPS.

6.2 Regular Backups

Regularly back up your server data to an offsite location to ensure data recovery in case of a breach.

6.3 Strong Authentication

Implement strong password policies and consider multi-factor authentication (MFA) for server access.

Conclusion

Protecting your VPS with Windows Defender is a cost-effective and reliable way to defend against malware and other threats. By following the steps outlined in this guide, you can enhance the security of your VPS, keeping your data and services safe from cyberattacks. Remember that while Windows Defender is a powerful tool, it’s just one piece of the security puzzle. A comprehensive security strategy should include multiple layers of defense to effectively protect your server in today’s ever-evolving threat landscape.

How to Start Your E-Commerce Business

In today’s rapidly evolving digital landscape, launching an e-commerce business is not only a viable option but also an increasingly popular one. As more consumers turn to online shopping, the opportunities for entrepreneurs in the e-commerce space are expanding. However, starting an e-commerce business requires careful planning, and one critical aspect to consider is choosing the right hosting solution. In this comprehensive guide, we will explore how to initiate and grow your e-commerce venture with the support of VPS (Virtual Private Server) hosting.

The Appeal of E-Commerce

Before we delve into the technical aspects of VPS hosting, it’s important to understand why e-commerce is such an attractive choice for aspiring business owners:

1. Global Reach

E-commerce provides a platform to reach a global audience. Regardless of your physical location, you can connect with customers worldwide, transcending geographical boundaries.

2. Lower Overheads

Compared to traditional brick-and-mortar stores, e-commerce businesses typically have lower overhead costs. You can avoid expenses related to renting physical space, utilities, and staffing.

3. Flexibility

E-commerce allows you to choose how you want to run your business. Whether you’re looking for a full-time endeavor or a side hustle, the flexibility of e-commerce caters to your lifestyle and goals.

4. Scalability

E-commerce platforms are designed to adapt to the changing needs of your business. Whether you’re a small startup or a large enterprise, you can scale your operations accordingly.

5. 24/7 Accessibility

Online stores are open 24/7, providing customers with the convenience of shopping at any time. This accessibility can lead to increased sales and customer satisfaction.

The Role of VPS Hosting

Now that you recognize the potential of e-commerce, let’s discuss the pivotal role of VPS hosting in your entrepreneurial journey.

What Is VPS Hosting?

VPS hosting is a form of web hosting that offers you a dedicated portion of a physical server, creating a virtual private server environment. This type of hosting offers numerous advantages over shared hosting:

  • Enhanced Performance: VPS hosting provides more resources, ensuring that your e-commerce website loads quickly and efficiently, even during periods of high traffic.
  • Control: With VPS hosting, you have full control over your server environment. This control allows for customization and the installation of essential software.
  • Security: VPS hosting incorporates enhanced security features to protect your online store and the sensitive data of your customers.
  • Scalability: As your business grows, VPS hosting can easily accommodate increased traffic and resource requirements.

Steps to Launch Your E-Commerce Business with VPS Hosting

Now that you’re convinced of the benefits of e-commerce and VPS hosting, let’s explore the step-by-step process to initiate your online business:

1. Choose Your E-Commerce Platform

Selecting the right e-commerce platform is your first major decision. Several popular options include Shopify, WooCommerce (for WordPress users), BigCommerce, and Magento. Your choice should align with your specific needs, budget, and technical proficiency.

2. Select a Reliable VPS Hosting Provider

The next crucial step is to choose a reputable VPS hosting provider that suits your budget and requirements. When evaluating potential providers, look for companies known for excellent customer support, high uptime guarantees, and robust security features.

3. Install Your E-Commerce Platform

After setting up your VPS hosting account, proceed to install your chosen e-commerce platform. MomentumX.Cloud offers a one-click installations for popular platforms, simplifying the setup process.

4. Customize Your Online Store

Tailor your online store to reflect your brand and showcase your products. Customization involves configuring your website’s design, adding product listings, setting up payment gateways, and defining shipping options.

5. Optimize for Peak Performance

Performance optimization is crucial for ensuring a seamless shopping experience for your customers. Employ content delivery networks (CDNs), caching mechanisms, and image optimization techniques to guarantee fast loading times. Keep in mind that a slow website can deter potential customers.

6. Implement Robust Security Measures

Security should be a top priority for your e-commerce business. Configure firewalls, install SSL/TLS certificates to secure data transmission, and regularly update your e-commerce platform and plugins to patch vulnerabilities.

7. Set Up Payment Processing

Integrate reliable payment gateways such as PayPal, Stripe, or Square to enable secure transactions. Ensure that your payment processing is seamless and user-friendly to build trust with your customers.

8. Launch Your Online Store

Once you’ve completed all preparations, it’s time to launch your e-commerce store. Announce the launch through your social media channels, email newsletters, and other marketing avenues to generate initial traffic.

9. Market Your E-Commerce Business

Effective marketing is essential for attracting customers to your online store. Utilize digital marketing techniques such as search engine optimization (SEO), social media marketing, pay-per-click advertising, and email marketing to drive traffic and sales.

10. Monitor and Adapt

Continuously monitor your e-commerce website’s performance and customer behavior. Utilize analytics tools to gather data and insights, enabling you to make informed decisions and continually enhance your online store.

Scaling Your E-Commerce Business

As your e-commerce business grows, consider these additional strategies:

1. Expand Your Product Range

Diversify your product offerings to attract a broader customer base. Keep an eye on market trends and consumer demands to identify new opportunities.

2. Enhance Customer Support

Invest in excellent customer support to build trust and loyalty. Promptly address customer inquiries and concerns to ensure a positive shopping experience.

3. Streamline Operations

Efficiently manage inventory, shipping, and order fulfillment processes to minimize errors and reduce costs.

4. Explore Marketing Channels

Experiment with different marketing channels to expand your reach. Consider influencer marketing, affiliate programs, and partnerships to increase brand visibility.

5. Customer Feedback

Listen to customer feedback and use it to improve your products, services, and website usability.

Conclusion

Starting an e-commerce business through VPS hosting can be a rewarding journey. By selecting the right e-commerce platform, partnering with a reliable VPS hosting provider, and adhering to best practices in performance, security, and marketing, you can establish your online store for success. Remember that building a thriving e-commerce business requires dedication and continuous effort. Stay committed to your goals, remain adaptable to changes, and always seek opportunities for growth and improvement. Your e-commerce adventure begins now—best of luck!

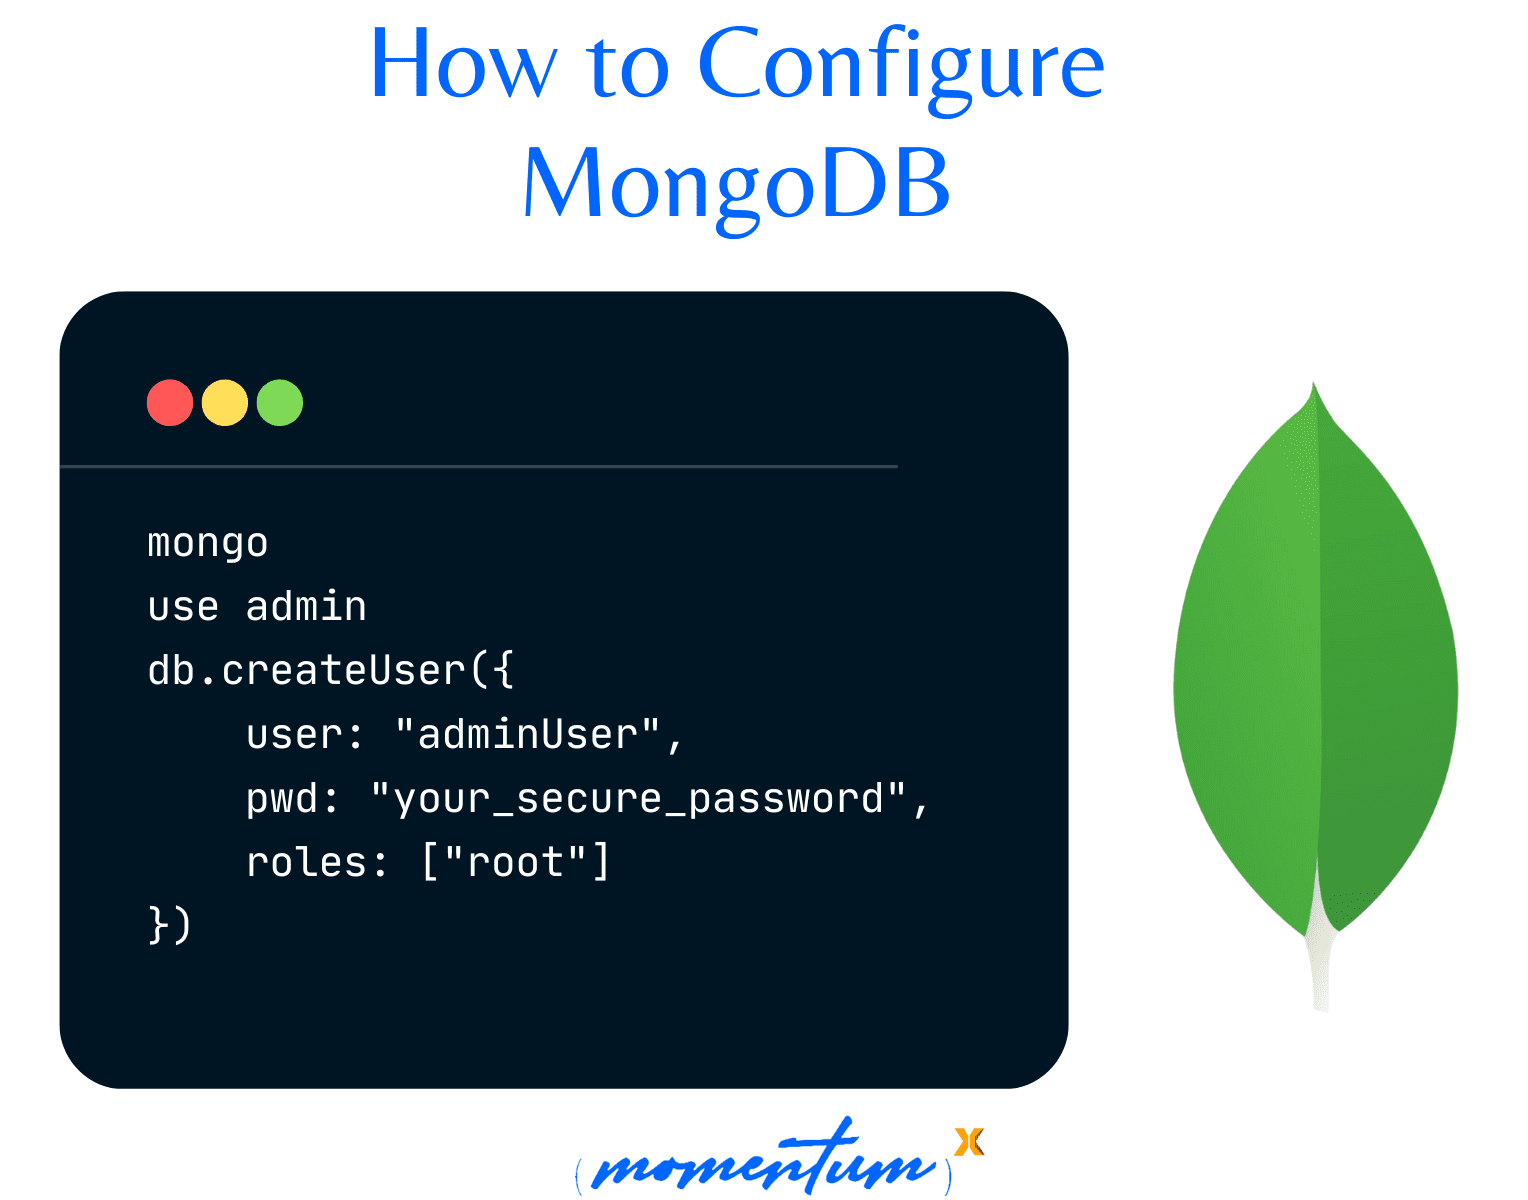
Mastering MongoDB on MomentumX.Cloud VPS: A Comprehensive Guide

Introduction

MongoDB, a leading NoSQL database, finds a perfect home within MomentumX.Cloud’s Virtual Private Servers (VPS), offering developers an exceptional platform for crafting high-performance, scalable, and secure applications. In this in-depth technical guide, we will explore advanced strategies and provide meticulous, step-by-step instructions to optimize MongoDB deployments within the MomentumX.Cloud environment. By delving into MongoDB’s intricacies and harnessing MomentumX.Cloud’s infrastructure to its fullest, you can create a data ecosystem that’s not just robust but extraordinary.


1. Securely Connecting to Your MongoDB Instance

Step 1: Utilize SSH Key Authentication

Begin by uploading your public SSH key to your MomentumX.Cloud VPS for secure, passwordless access.


ssh-copy-id username@your_server_ip

Step 2: Configure IP Whitelisting

Modify MongoDB configuration to allow connections only from specific IP addresses.


sudo nano /etc/mongod.conf


Add your server’s IP to the bindIp field:

net:
  bindIp: 127.0.0.1,<Your_Server_IP>

Step 3: Enable MongoDB Authentication

Create an administrative user and enable authentication in MongoDB.


mongo
use admin
db.createUser({
    user: "adminUser",
    pwd: "your_secure_password",
    roles: ["root"]
})

2. Enabling SSL/TLS Encryption

Step 1: Generate SSL Certificates

Generate SSL certificates for MongoDB to enable encryption.


openssl req -newkey rsa:2048 -new -x509 -days 365 -nodes -out mongodb-cert.crt -keyout mongodb-cert.key

Step 2: Configure MongoDB for SSL/TLS

Edit MongoDB configuration to enable SSL/TLS encryption.


sudo nano /etc/mongod.conf

Add SSL configuration:


net:
  ssl:
    mode: requireSSL
    PEMKeyFile: /etc/ssl/mongodb-cert.key
    PEMCertificateFile: /etc/ssl/mongodb-cert.crt

3. Implementing Advanced Authentication and Authorization

Step 1: Create MongoDB Roles

Craft custom MongoDB roles tailored to your application’s needs.


mongo
use admin
db.createRole({
    role: "customRole",
    privileges: [
        { resource: { db: "yourDB", collection: "" }, actions: ["find", "insert", "update", "remove"] }
    ],
    roles: []
})

Step 2: Assign Roles to Users

Assign custom roles to MongoDB users.


use yourDB
db.createUser({
    user: "dbUser",
    pwd: "user_password",
    roles: ["customRole"]
})

4. Performance Optimization Through Query Optimization

Step 1: Create Indexes

Identify and create indexes to optimize query performance.


use yourDB
db.yourCollection.createIndex({ fieldToIndex: 1 })

Step 2: Utilize Aggregation Framework

Leverage the Aggregation Framework for complex transformations within the database.


db.yourCollection.aggregate([
    { $group: { _id: "$category", total: { $sum: 1 } } },
    { $sort: { total: -1 } }
])

5. Robust Backup Strategies

Step 1: Set Up Automated Backups

Automate backups using mongodump and schedule it with cron jobs. Store backups securely.


0 2 * * * /path/to/mongodump --out /backup/folder/$(date +\%Y\%m\%d\%H\%M\%S)

Step 2: Implement PITR (Point-In-Time Recovery)

Enable MongoDB’s Oplog to perform Point-In-Time Recovery (PITR) for precise data restoration.


mongod --oplogSize 100

6. Failover Strategies and High Availability

Step 1: Configure Replica Sets

Configure MongoDB replica sets for high availability and failover.


mongo
rs.initiate({
   _id : "yourReplicaSet",
   members: [
      { _id : 0, host : "mongo1:27017" },
      { _id : 1, host : "mongo2:27017" },
      { _id : 2, host : "mongo3:27017" }
   ]
})

Step 2: Implement Read Concern and Write Concern

Configure Read Concern and Write Concern settings for consistency and performance.


db.getMongo().setReadConcern("majority")
db.getMongo().setWriteConcern("majority")

7. Horizontal Scalability and Sharding

Step 1: Enable Sharding

Enable sharding for the desired database.


mongo
sh.enableSharding("yourDB")

Step 2: Choose Appropriate Shard Keys

Select a suitable shard key to ensure even data distribution across shards.


sh.shardCollection("yourDB.yourCollection", { shardKeyField: 1 })

By following these detailed technical steps, combined with MongoDB’s capabilities and MomentumX.Cloud’s reliable infrastructure, you’ll create a MongoDB deployment that’s not just optimized but exceptional. Mastering MongoDB within MomentumX.Cloud’s VPS ensures unparalleled performance, reliability, and scalability for your applications.

Maximizing Startup Success with Virtual Private Servers (VPS)

Introduction

In the dynamic landscape of today’s business world, startups need a resilient technological foundation to thrive. As digital platforms and applications take center stage, a dependable web hosting solution is paramount. Enter Virtual Private Servers (VPS), a versatile hosting choice that offers startups a balance of performance, scalability, customization, and cost-efficiency. This technical article explores seven core benefits of integrating VPS into your startup’s strategy, helping you navigate the digital realm with confidence.


1. Cost-Effectiveness: Optimizing Budget Allocation

Startups often operate within tight budgets, making cost-effectiveness a crucial consideration. VPS hosting strikes a balance between performance and affordability. Unlike dedicated servers, which can be expensive, VPS grants access to dedicated resources at a fraction of the cost. This means startups can access the computing power and resources they need, even in their early stages, without overspending.

2. Scalability: Adapting Seamlessly to Growth

Startups are known for their rapid growth and evolving resource demands. VPS hosting facilitates effortless resource scaling, accommodating fluctuations in traffic and requirements. This agility ensures that your digital presence remains responsive, allowing your startup to handle increased user numbers without compromising performance.

3. Performance: Elevating User Experience and Credibility

User experience is pivotal in the competitive startup ecosystem. VPS hosting guarantees consistent performance, even during peak usage. This leads to improved loading times, seamless navigation, and enhanced user satisfaction. A strong user experience from the start can help build a positive reputation for your startup.

4. Customization: Tailoring the Environment to Suit

Every startup is unique, and off-the-shelf solutions might not fit the bill. VPS hosting empowers you to tailor your server environment precisely. This level of control allows you to install software, set security measures, and optimize the environment to align with your startup’s specific needs, ensuring that your hosting solution supports your business goals effectively.

5. Security: Strengthening Your Digital Defenses

In an age of heightened cybersecurity threats, data protection is paramount. VPS hosting offers advanced security compared to shared hosting options. The isolation of your environment from other users minimizes the risk of data breaches and malware attacks. Additionally, VPS grants you the authority to implement custom security measures, giving you full control over safeguarding your startup’s digital assets.

6. Remote Access: Enabling Agile Work Environments

Startups often operate in remote-friendly setups. VPS hosting facilitates remote access to your server environment, promoting collaboration among team members whether they’re working from the same office or remotely. This flexibility streamlines communication, boosts efficiency, and enables effective issue resolution.

7. Testing and Development: Fostering Innovation with Confidence

Innovation is the lifeblood of startups, necessitating a safe space for experimentation. VPS serves as an innovation playground, allowing you to set up isolated environments for testing and development. This ensures that changes can be thoroughly assessed without risking the stability of your live applications, empowering your startup to innovate confidently.

Conclusion

In the rapidly changing startup landscape, a robust digital infrastructure is a cornerstone of success. Virtual Private Servers (VPS) offer startups an array of advantages, seamlessly aligning with their dynamic nature and resource-intensive demands. From cost-effectiveness and scalability to enhanced performance, customized environments, fortified security, and more, VPS hosting provides startups with a solid foundation. By embracing VPS hosting, startups can position themselves for growth, innovation, and a competitive edge in today’s digital economy. In this era of strategic technology choices, the decision to opt for VPS hosting is not just technical—it’s a move that can propel your startup to unparalleled heights of achievement.

With these seven benefits in mind, it’s evident that Virtual Private Servers (VPS) present startups with a robust hosting solution that can drive growth, elevate user experience, and bolster security measures. As startups continue to navigate the competitive business landscape, harnessing the advantages of VPS hosting can significantly impact their journey toward success. By integrating VPS hosting into your startup’s technology roadmap, you’re setting the stage for innovation, scalability, and a resilient online presence that aligns seamlessly with your business aspirations.

Revolutionizing Industries with ChatGPT and Cloud Computing: A Multi-Sector Approach

Introduction

The fusion of cloud computing and advanced AI models like ChatGPT is redefining industries and reimagining user interactions. As technology advances, businesses across various sectors are harnessing this amalgamation to amplify customer experiences, streamline operations, and spark innovation. In this blog post, we’ll explore how the integration of ChatGPT into cloud computing can reshape not only ecommerce and real estate but also a diverse range of other industries.

The Power of ChatGPT

ChatGPT’s innate ability to comprehend and generate human-like text has opened doors to natural language interactions between users and systems. Its applications span customer support, content creation, and beyond, ushering in enriched digital experiences.

The Rise of Cloud Computing

Cloud computing’s impact on businesses is undeniable, offering scalability, efficiency, and cost-effectiveness. Nevertheless, user interactions have traditionally been limited to web interfaces and APIs. By incorporating ChatGPT into cloud computing, a conversational dimension is added, making interactions more intuitive and engaging.


Ecommerce: Revolutionizing Customer Engagement

In the realm of ecommerce, where customer engagement is paramount, the integration of ChatGPT into cloud computing has transformative implications.

  • Real-time Customer Support: Ecommerce platforms can extend personalized customer support 24/7. ChatGPT can swiftly address inquiries, resolve issues, and provide assistance, leading to seamless shopping experiences.

  • Hyper-Personalized Recommendations: By analyzing browsing history and preferences, ChatGPT can offer highly targeted product recommendations. This not only drives sales but also fosters customer loyalty through curated shopping journeys.

  • Effortless Order Tracking: Customers can inquire about order statuses using natural language. ChatGPT retrieves real-time updates from the cloud-based order system, eliminating the need for customers to navigate complex interfaces.

  • Simplified Returns and Refunds: The return and refund process is simplified as ChatGPT guides customers through each step. This transforms potentially frustrating experiences into smooth interactions.

Real Estate: Revolutionizing Property Exploration

The real estate industry, known for its complex property search and information dissemination, benefits from integrating ChatGPT into cloud computing.

  • Efficient Property Search: Potential buyers and renters can describe their preferences, allowing ChatGPT to retrieve suitable property listings. This saves time and presents options aligned with user requirements.

  • Comprehensive Property Insights: ChatGPT provides detailed property information, encompassing features, pricing, and neighborhood amenities. Users can query properties as if conversing with a knowledgeable real estate agent.

  • Virtual Tours through Language: In situations where physical visits are limited, ChatGPT offers virtual property tours through descriptive language. Users can envision layouts and seek information on specific areas.

  • Informed Negotiations: ChatGPT empowers buyers and sellers by offering insights into market trends and comparable property prices. This information fuels informed decisions and effective negotiations.

Healthcare: Augmenting Patient Interactions

In the healthcare sector, where patient interactions and information dissemination are critical, the integration of ChatGPT into cloud computing enhances these processes.

  • Personalized Medical Queries: Patients can seek information about symptoms, treatments, and medications using natural language. ChatGPT provides accurate and reliable information sourced from reputable medical databases.

  • Appointment Management: ChatGPT assists patients in scheduling appointments with doctors and specialists. It sends reminders and notifications, ensuring a seamless patient experience.

  • Proactive Health Tips: Patients receive tailored health tips based on their medical history and conditions. This encourages healthier lifestyles and self-care.

  • Medication Assistance: ChatGPT helps patients set medication reminders and answers questions about prescription instructions.

Conclusion

The synergy between ChatGPT and cloud computing transcends industries, creating a holistic transformation in how businesses interact with users. Ecommerce, real estate, healthcare – each sector benefits from enhanced customer experiences, streamlined operations, and innovative services. As technology continues to evolve, the potential for AI-powered cloud interactions is limitless, promising a future where businesses across diverse domains embrace the power of intelligent conversations. The convergence of ChatGPT and cloud computing is a testament to the ever-expanding possibilities of digital transformation, ushering in a new era of intuitive, engaging, and efficient interactions.

Simplified PostgreSQL Database Setup on Your VPS

Introduction

As a cloud provider committed to delivering a seamless experience to our valued customers, we understand that time and efficiency are paramount. That’s why we offer VPS (Virtual Private Server) instances preconfigured with PostgreSQL templates, eliminating the need for you to navigate the intricacies of PostgreSQL installation and setup. This comprehensive guide will walk you through the steps to access, configure, and secure your PostgreSQL database effortlessly on your VPS.


Step 1: Provisioning Your PostgreSQL-Ready VPS

As an esteemed user of our cloud services, you’re already acquainted with our user-friendly provisioning process. Select the VPS instance that aligns with your specific requirements and budget. During the provisioning process, you’ll notice an option to choose the PostgreSQL template. By selecting this template, you ensure that PostgreSQL is preinstalled and ready for use as soon as your VPS instance is up and running.

Step 2: Seamless Access to PostgreSQL

Upon successful provisioning, you can effortlessly access PostgreSQL on your VPS without the need for intricate installations or configurations. Utilize SSH (Secure Shell) to establish a secure connection to your VPS. Once connected, you’ll have immediate command-line access to your PostgreSQL database.

Step 3: Dive Right Into PostgreSQL

With PostgreSQL preinstalled on your VPS, you can dive straight into utilizing this robust relational database management system for your applications. We’ve gone the extra mile to simplify your experience. The default ‘postgres’ user is already configured for administrative tasks. This means you can start creating databases, defining roles, and managing your PostgreSQL instance without delay.

Step 4: Tailor PostgreSQL to Your Needs (Optional)

While our preconfigured setup caters to the majority of use cases, we recognize that your requirements may be unique. PostgreSQL’s flexibility allows for extensive customization to align with your specific needs. Whether you need to fine-tune memory settings, adjust authentication methods, or incorporate additional extensions, PostgreSQL on your VPS is ready to adapt.

Step 5: Prioritize Security for Your PostgreSQL Installation

At our core, security is paramount. To ensure your PostgreSQL installation is fortified, consider the following best practices:

  1. Modify Default Passwords: If desired, change the default passwords for users, including the ‘postgres’ user, to enhance security.

  2. Implement Firewall Rules: Strengthen your VPS security by configuring firewall rules to restrict access to your PostgreSQL server. This safeguards your database, allowing connections only from trusted IP addresses.

  3. Regular Data Backups: Protect your data by implementing a regular backup strategy. This practice ensures that your critical information remains secure, even in the event of unexpected incidents.

  4. Stay Updated: To stay ahead of potential security vulnerabilities, keep both your VPS operating system and PostgreSQL installation up to date with the latest security patches.

Expanding on PostgreSQL

Now that we’ve covered the essentials of our PostgreSQL-ready VPS offerings, let’s delve deeper into the world of PostgreSQL and explore some advanced concepts and features that can empower you to make the most of this powerful database system.

PostgreSQL: A Brief Overview

PostgreSQL, often referred to as “Postgres,” is a powerful and highly extensible open-source relational database management system. It has gained popularity among developers, data engineers, and organizations due to its robust features, scalability, and active community support.

Why Choose PostgreSQL?

Before we dive into the more advanced aspects of PostgreSQL, let’s quickly revisit some of the key reasons why PostgreSQL is a compelling choice for your database needs:

  1. Extensibility: PostgreSQL’s extensible architecture allows developers to create custom data types, operators, and functions, making it highly adaptable to specific use cases.

  2. Data Integrity: PostgreSQL enforces data integrity constraints, ensuring that your data remains accurate and consistent.

  3. Advanced Indexing: The database offers various indexing techniques, including B-tree, Hash, GiST, and GIN, to optimize query performance.

  4. Concurrency Control: PostgreSQL provides advanced concurrency control mechanisms, enabling multiple users to access and modify data simultaneously without conflicts.

  5. Data Types: The system supports a wide range of data types, including traditional types like integers and text, as well as more specialized types such as JSON, JSONB (binary JSON), and arrays.

  6. Advanced Querying: PostgreSQL offers powerful querying capabilities, including support for complex joins, subqueries, and window functions.

Advanced PostgreSQL Features

Now, let’s explore some advanced features and concepts within PostgreSQL that can enhance your database management experience:

1. Partitioning

Partitioning is a technique used to divide large tables into smaller, more manageable pieces called partitions. Each partition can be stored on a different physical storage device or file system, allowing for improved query performance and easier data management. PostgreSQL provides various partitioning methods, including range, list, and hash partitioning.

2. Replication and High Availability

High availability and data redundancy are critical in many database applications. PostgreSQL offers robust replication options, including streaming replication, logical replication, and synchronous replication. These features allow you to create standby servers for failover and load balancing, ensuring minimal downtime.

3. Index Types

In addition to traditional B-tree indexes, PostgreSQL supports several specialized index types tailored to specific data types and use cases. These include GiST (Generalized Search Tree), GIN (Generalized Inverted Index), SP-GiST (Space-partitioned Generalized Search Tree), and more. Choosing the right index type can significantly improve query performance.

4. Full-Text Search

PostgreSQL includes a powerful full-text search engine that enables you to perform complex text searches with features like stemming, ranking, and phrase matching. This is invaluable for applications that require advanced text search capabilities, such as e-commerce sites and content management systems.

5. JSON and JSONB

PostgreSQL’s support for JSON (JavaScript Object Notation) and JSONB (binary JSON) allows you to store, query, and manipulate semi-structured and unstructured data efficiently. JSONB, in particular, offers a compact binary format that balances storage space and query performance.

6. Advanced Query Optimization

PostgreSQL’s query planner and optimizer are highly advanced, but there are techniques you can use to further optimize query performance. This includes understanding query execution plans, utilizing indexing effectively, and periodically analyzing and vacuuming tables.

7. Custom Functions and Extensions

PostgreSQL’s extensibility is one of its standout features. You can create custom functions and aggregates in various programming languages like C, Python, and JavaScript. Additionally, you can extend PostgreSQL’s functionality by installing extensions, such as PostGIS for geospatial data or pgcrypto for cryptographic operations.

8. Advanced Security Features

Beyond the basic security practices mentioned in the main guide, PostgreSQL offers advanced security features, such as row-level security and column-level encryption. These features allow you to implement fine-grained access control and protect sensitive data.

9. Foreign Data Wrappers (FDW)

PostgreSQL’s FDW feature allows you to integrate data from external sources seamlessly. You can use FDW to query data from other PostgreSQL databases or connect to various external data sources like other relational databases, NoSQL databases, or web services.

10. Performance Monitoring and Tuning

Effective performance monitoring and tuning are essential for maintaining a healthy database. PostgreSQL provides tools like pg_stat_statements and pg_stat_monitor for collecting performance-related statistics. You can also adjust configuration parameters to optimize resource utilization.

Looking to the Future

As a cloud provider, we’re committed to staying at the forefront of technology and continually enhancing our services. We’re excited to announce that we have plans to introduce even more features and optimizations for PostgreSQL on our platform. Here’s a sneak peek at some of the developments you can look forward to in the near future:

1. Automated Scaling

We understand that your database workloads may vary over time. To ensure that you always have the right amount of resources at your disposal, we’re working on automated scaling solutions that can dynamically adjust your PostgreSQL instance’s capacity based on usage patterns.

2. Enhanced Monitoring and Insights

Monitoring the performance and health of your PostgreSQL database is critical. We’re investing in advanced monitoring tools and insights that will provide you with a comprehensive view of your database’s performance, allowing you to make data-driven decisions.

3. Integration with Machine Learning and AI

The integration of machine learning and AI capabilities within PostgreSQL is an exciting frontier. We’re actively exploring ways to seamlessly integrate machine learning libraries and tools into our PostgreSQL offering, enabling you to leverage the power of AI for data analysis and insights.

4. Geo-Distributed Deployments

For organizations with global reach, we’re planning to expand our PostgreSQL deployment options to include geo-distributed configurations. This will enable you to deploy PostgreSQL instances in multiple regions, providing low-latency access to your data for users around the world.

5. DevOps Integration

Streamlining the development and deployment of applications that rely on PostgreSQL is a priority. We’re working on DevOps integrations that will make it easier for development teams to manage database changes, automate deployments, and ensure continuous integration and delivery.

6. Cost Optimization Tools

We understand the importance of cost efficiency. Our upcoming cost optimization tools will help you analyze your PostgreSQL usage and identify opportunities to reduce costs without compromising performance or security.

7. User Community and Knowledge Sharing

In addition to technical enhancements, we’re committed to fostering a vibrant user community. We’ll be launching knowledge-sharing platforms, forums, and user groups to facilitate collaboration, best practice sharing, and networking among PostgreSQL enthusiasts.

Conclusion: Your Database Journey with PostgreSQL

The world of database management is constantly evolving, and PostgreSQL remains a versatile and reliable choice for a wide range of applications. Whether you’re a seasoned PostgreSQL user or just getting started, we’re here to support your journey and help you harness the full potential of this exceptional database system.

With PostgreSQL, the possibilities are limitless, and we’re excited to be part of your database journey. Let’s embark on this path of discovery and growth together.

Simplifying Website Creation: Using WordPress via cPanel’s WP Toolkit on MomentumX.Cloud VPS

Introduction

In today’s digital landscape, creating a powerful online presence is essential for individuals and businesses alike. Launching your website has become more accessible and efficient than ever before. This comprehensive guide will walk you through the process of setting up your website using the WP Toolkit within cPanel, showcasing the seamless integration of WordPress on the MomentumX.Cloud VPS platform.

Prerequisites

Before you begin, ensure you have the following:

  • A registered domain name.
  • Access to your MomentumX.Cloud VPS with cPanel.


Step 1: Accessing Your cPanel Dashboard

  1. Log In: Using the credentials provided by MomentumX.Cloud, log in to your cPanel dashboard. You can usually access cPanel by navigating to https://your_server_ip:2083 in your preferred web browser.

Step 2: Installing WordPress via WP Toolkit

  1. Locate WP Toolkit: Within the cPanel dashboard, find and click on the “WP Toolkit” section. This will grant you access to the WP Toolkit interface.

  2. Install WordPress: Inside the WP Toolkit, navigate to the “Install” tab. Clicking on “Install” will initiate the WordPress installation process.


  1. Configure Installation:

    • Choose the desired domain from the dropdown menu where you wish to install WordPress.
    • Leave the “Directory” field empty to install WordPress in the root directory.
    • Set an admin username and password for your WordPress admin dashboard.
  2. Advanced Options: While you have the option to customize settings like database name and table prefix, the default configurations are typically suitable for most users.

  3. Install: Click the “Install” button to kick off the installation process. The WP Toolkit will handle the installation, and you will receive a confirmation message upon successful completion.

  4. Completion: Once the installation is finished, you’ll receive a confirmation message along with the login credentials for your WordPress admin dashboard.


Step 3: Personalizing Your WordPress Website

  1. Accessing Your WordPress Dashboard: To access your WordPress admin dashboard, open your web browser and navigate to your domain (e.g., http://yourdomain.com). Add /wp-admin to the URL (e.g., http://yourdomain.com/wp-admin) and log in using the credentials provided during installation.

  2. Selecting a Theme: Visit the “Appearance” section within the WordPress dashboard and click on “Themes.” Choose and activate a theme that aligns with your website’s design and purpose.

  3. Installing Plugins: Enhance your website’s functionality by installing plugins. Navigate to “Plugins” and select “Add New.” Search for and install plugins that cater to your needs, such as SEO optimization, security enhancements, contact forms, and more.

Step 4: Crafting Your Website’s Identity

  1. Creating Content: Take advantage of the “Pages” and “Posts” sections to create, edit, and manage your website’s content. WordPress’s intuitive block editor simplifies content creation and formatting.

  2. Media Integration: Seamlessly integrate images, videos, and other multimedia elements by accessing the “Media” section. You can upload files directly or embed media from external sources.

  3. SEO Optimization: To enhance your website’s visibility on search engines, consider installing an SEO plugin. Configure meta titles, descriptions, and keywords to improve your website’s search engine rankings.

Step 5: Launching Your Website

  1. Performance Check: Regularly assess your website’s performance using tools like GTmetrix or Google PageSpeed Insights. Address any performance bottlenecks to ensure optimal loading speed and user experience.

  2. Backup Strategy: Implement a robust backup strategy using cPanel’s backup features. Regular backups will safeguard your website’s data and content.

  3. Time to Go Live: With your website polished and ready, it’s time to go live. Share your domain with your target audience and initiate your online presence.

Conclusion

Through the fusion of MomentumX.Cloud VPS, cPanel’s WP Toolkit, and the versatile WordPress platform, you’ve achieved a streamlined and efficient process for setting up and launching your website. From installation to customization and deployment, these integrated tools have enabled you to create a compelling online presence. As you continue to refine your website, stay informed about the latest WordPress themes, plugins, and optimization techniques to ensure your site resonates with your audience and achieves your goals.

Understanding the Difference between SaaS, PaaS, and IaaS

We often come across acronyms like SaaS, PaaS, and IaaS when discussing cloud computing. While these terms may appear cryptic, they represent distinct models for leveraging cloud resources, each tailored to specific business requirements. In this comprehensive guide, we’ll go into the intricacies of Software as a Service (SaaS), Platform as a Service (PaaS), and Infrastructure as a Service (IaaS). By the end, you’ll have a thorough understanding of these concepts and how they can benefit your organization.

Introduction

Cloud computing has transformed the IT landscape, offering businesses access to a vast array of computing resources via the internet. These cloud service models—SaaS, PaaS, and IaaS—have emerged to address varying needs, from deploying applications to managing infrastructure. Let’s demystify these models and explore their unique characteristics.

Software as a Service (SaaS)

SaaS stands for Software as a Service, and it’s often the most user-friendly of the three cloud service models. In this model, software applications are hosted and maintained by a third-party provider, and users access them through the internet. Here are key characteristics of SaaS:

Accessibility and Convenience

SaaS applications are incredibly accessible. Users can access these applications via web browsers without the need to install or manage software on their local devices. This convenience allows users to work from virtually anywhere with an internet connection.

Hassle-Free Maintenance

One of SaaS’s major benefits is its hands-off maintenance. The SaaS provider handles tasks such as software updates, security, scalability, and availability. This means users can focus solely on utilizing the software to meet their business needs, without worrying about technical intricacies.

Real-World Examples

SaaS has become an integral part of both personal and business workflows. Examples include Gmail for email, Salesforce for customer relationship management (CRM), Microsoft 365 for office productivity, and Dropbox for file storage and collaboration.

Ideal Use Cases

SaaS is ideal for businesses that seek ready-to-use software solutions without the complexities of infrastructure management or application development. It’s especially beneficial for tasks like email management, document collaboration, and customer relationship management.

Platform as a Service (PaaS)

PaaS, short for Platform as a Service, provides a platform and environment for developers to create, deploy, and manage applications. Here are the key features of PaaS:

Development-Focused Environment

PaaS platforms offer a development environment equipped with tools and services that streamline the application development process. These tools often include integrated development environments (IDEs), databases, and application hosting services.

Scalability and Flexibility

Scalability is a significant advantage of PaaS. Developers can easily scale applications up or down to accommodate changing workloads, as the underlying infrastructure is managed by the PaaS provider. This scalability is crucial for applications with varying demands.

Ideal Use Cases

PaaS is suitable for organizations that prioritize application development and deployment while relinquishing control over the underlying infrastructure. It’s an excellent choice for software developers and development teams working on web applications, mobile apps, and APIs.

Infrastructure as a Service (IaaS)

IaaS, or Infrastructure as a Service, serves as the foundational cloud service model, providing virtualized computing resources over the internet. Key characteristics of IaaS include:

Virtualized Infrastructure

IaaS delivers virtualized resources such as Cloud VPS, virtual machines (VMs), storage, and networking. Users can provision and manage these resources based on their requirements. This virtualization provides flexibility and cost savings compared to traditional on-premises infrastructure.

Enhanced Control

Users have greater control over their infrastructure configurations within the IaaS model. They can select the operating system, install and configure software, manage security settings, and control network configurations. This level of control is particularly valuable for organizations with specific technical needs.

Ideal Use Cases

IaaS is advantageous for businesses that require complete control over their IT infrastructure. It’s well-suited for hosting custom applications, managing databases, hosting websites, and conducting data analytics. It allows organizations to tailor their infrastructure to their unique needs.

Key Differences at a Glance

Let’s summarize the primary differences between SaaS, PaaS, and IaaS:

Ownership and Management

  • SaaS: The software company manages everything, from software maintenance to infrastructure.
  • PaaS: Developers manage applications, while the platform provider manages the underlying infrastructure.
  • IaaS: Users have control over virtualized infrastructure, including selecting the operating system and software installations.

Accessibility

  • SaaS: Accessible via web browsers; no need for local installations.
  • PaaS: Developers create and run applications using provided tools.
  • IaaS: Users build and manage their own virtual infrastructure.

Ideal Use Cases

  • SaaS: Best for ready-to-use software solutions for end-users.
  • PaaS: Suited for application development, simplifying the development process and scaling applications efficiently.
  • IaaS: Beneficial for organizations that require control over infrastructure configurations to meet specific needs.

Choosing the Right Model

Selecting the appropriate cloud service model depends on your organization’s specific needs and objectives. Here are considerations to help you make an informed decision:

SaaS

  • Opt for SaaS when your primary goal is to use software without hassle. It’s ready to go.
  • Ideal for everyday tasks like email, document collaboration, and customer management.

PaaS

  • Choose PaaS when you’re a developer or development team looking to streamline application development and deployment.
  • Helpful for making apps quickly and scaling them as demand grows.

IaaS

  • Go for IaaS when you need complete control over your infrastructure, with specific requirements for software, security, or custom configurations.
  • Useful for hosting custom applications, managing databases, and handling infrastructure your way.

Conclusion

In conclusion, comprehending the differences between SaaS, PaaS, and IaaS is crucial for making informed decisions about cloud services. Each cloud service model offers unique features and advantages, tailored to diverse business needs and technical requirements.

By understanding these cloud service models, you can make choices aligned with your business goals in the ever-evolving world of cloud computing. Whether you prioritize user-friendly software, streamlined application development, or full control over your technology stack, the cloud can empower your organization with flexibility, scalability, and efficiency, fostering innovation and growth in the digital era. Don’t hesitate to embrace the cloud in a manner that suits your unique needs and objectives!

VPS vs. VPC : If Price Is Not the Deciding Factor

In today’s digital age, where businesses and individuals alike rely heavily on the internet, the concepts of VPS (Virtual Private Server) and VPC (Virtual Private Cloud) have gained significant prominence. Both VPS and VPC are essential tools for managing and securing online resources, yet they serve different purposes and offer distinct advantages. In this comprehensive article, we will explore the key differences between VPS and VPC and delve into why VPC is increasingly becoming a necessity for startups, large businesses, and individuals, especially when price is not the sole determining factor.

VPS: A Closer Look

A Virtual Private Server (VPS) is a virtualized server hosted on a physical server alongside other virtual servers. It provides users with a dedicated portion of resources, including CPU, RAM, and storage, in a shared hosting environment. VPS hosting offers greater control, security, and customization compared to traditional shared hosting.

Key Features of VPS:

  1. Resource Allocation: Users receive dedicated resources, ensuring consistent performance even during traffic spikes.

  2. Isolation: VPS instances are isolated from one another, enhancing security and preventing one user from affecting the performance of others.

  3. Customization: Users can install and configure software and applications based on their specific requirements.

  4. Root Access: VPS users typically have root or administrator access, granting them full control over the server.

  5. Cost-Effective: VPS hosting is more affordable than dedicated servers, making it suitable for small to medium-sized businesses.


VPC: A Deeper Dive

A Virtual Private Cloud (VPC) is a network of virtualized resources hosted within a public cloud infrastructure. VPCs allow organizations to create isolated, private networks in the cloud, offering control, security, and scalability over their cloud resources. VPCs are commonly used in cloud computing platforms like Amazon Web Services (AWS), Microsoft Azure, and Google Cloud Platform (GCP).

Key Features of VPC:

  1. Network Isolation: VPCs provide a private network within a public cloud, ensuring that resources are not directly exposed to the internet.

  2. Security: VPCs allow for fine-grained control over network traffic, including the use of firewalls, security groups, and access control lists (ACLs).

  3. Scalability: VPCs are highly scalable, enabling organizations to easily add or remove resources as needed.

  4. Geographic Distribution: VPCs can be set up in multiple regions or availability zones, improving redundancy and disaster recovery capabilities.

  5. Integration: VPCs can seamlessly integrate with other cloud services, such as databases, storage, and container services.

Why VPC is Becoming a Necessity

Now that we have a deeper understanding of both VPS and VPC, let’s explore why VPC is increasingly becoming a necessity, especially when price is not the sole consideration.

  1. Enhanced Security: In an era marked by an increasing frequency of cyber threats and data breaches, security is paramount. VPCs provide robust security measures, including network isolation, firewall rules, and encryption, making them a critical choice for businesses of all sizes. While VPS does offer isolation, VPC takes security to the next level by allowing you to create private networks with granular control over traffic flow.

  2. Scalability: Startups and large enterprises alike need the flexibility to scale their infrastructure as demand fluctuates. VPC offers seamless scalability, ensuring that resources can be added or removed with ease. This scalability is especially advantageous for organizations with dynamic workloads or rapidly changing resource requirements.

  3. Resource Allocation: VPS provides dedicated resources, which is an advantage over shared hosting. However, VPC can allocate resources more dynamically to meet changing demands. With VPC, you have the ability to adjust CPU, memory, and storage resources on the fly, ensuring optimal performance at all times.

  4. Customization and Control: VPS gives you control over the server, allowing you to install and configure software as you see fit. It’s a good choice if you have specific application requirements that necessitate deep server-level customization. On the other hand, VPC provides control over the network and infrastructure, which is ideal for businesses focused on managing the overall architecture and connectivity of their cloud resources.

  5. Geographic Distribution: In an increasingly globalized world, businesses require the ability to deploy resources in various geographic locations to serve a global customer base. VPCs, especially those offered by major cloud providers, can be distributed across multiple regions and availability zones, enhancing redundancy and global reach. This geographic distribution is crucial for ensuring low-latency access and high availability.

  6. Compliance and Regulations: Many industries have strict regulatory requirements regarding data security and privacy, such as HIPAA, GDPR, or PCI DSS. VPC provides the tools and features necessary to comply with these regulations. It offers encryption, access controls, and audit trails, making it easier for businesses to meet compliance standards.

  7. Ease of Management: VPCs often come with advanced management tools and automation options, making it easier to manage complex infrastructure. With VPC, you can leverage cloud-native tools for resource provisioning, monitoring, and scaling. This simplifies operational tasks and reduces the administrative burden on IT teams.

Conclusion

In the evolving landscape of web hosting and cloud computing, VPS and VPC represent two distinct but crucial solutions for businesses and individuals. When price is not the sole determining factor, the choice between VPS and VPC should be based on the specific technical requirements and priorities of your project or organization.

VPC is generally more versatile, scalable, and secure, making it a preferred choice for larger enterprises and mission-critical applications. It offers robust security measures, granular control over network traffic, and the ability to scale resources dynamically. Additionally, VPC provides geographic distribution and compliance features that are essential for global operations and regulatory adherence.

On the other hand, VPS may be suitable for smaller projects or applications that require more server-level customization. It offers dedicated resources and root access, making it a cost-effective choice for individual developers and smaller businesses.

In summary, whether you are a startup looking to establish a secure online presence, a large business aiming to optimize your cloud infrastructure, or an individual seeking robust hosting options, understanding the differences between VPS and VPC is essential in making the right choice for your specific needs. As digital transformation continues, VPC is undeniably becoming a necessity for a wide range of users, offering the foundation for secure and agile cloud operations, especially when technical requirements and capabilities are the primary focus.

What Is a VPS ? A Friendly Guide of basics

Introduction

In the world of the internet, there are many tricky words, and “VPS” or Virtual Private Server is one of them. But don’t worry; we’re here to explain VPS in simple terms, so even if you’re not very familiar with Tech, you can understand what it means.

Imagine Your Own Space on the Internet

Think of VPS like having your own little space on the internet. It’s a bit like having your own private room in a big house. This space is just for you, and you can use it to do things on the internet, like having your own website.

How Does VPS Work?

Here’s a simple way to understand how it works:

  1. The Virtual Part: VPS is “virtual” because it’s not something you can touch. It’s like having a special place on the internet that only you can use. It’s like having a special part of a computer that’s just for you.

  2. The Private Part: It’s “private” because it’s only yours. It’s like having a room in a big house that no one else can enter. Your things are safe in that room, and no one else can use them.

  3. The Server Part: Sometimes people talk about a “server.” Think of this as a very powerful computer that helps you keep your special internet space safe and running smoothly.

Why Is VPS Important?

Now, you might wonder why VPS is a big deal. Here are some good reasons:

1. Faster and Better: VPS makes your space on the internet faster and better. It’s like having a supercharged car instead of a regular one.

2. Safe and Secure: Just like you lock your room to keep your things safe, VPS keeps your internet space safe. Your website and information are protected.

3. You’re in Control: With VPS, you are the boss. You can decide how your space looks and what you can do with it. It’s like decorating your room the way you want.

4. No Sharing: Unlike sharing a room with someone, VPS gives you your own space. You don’t have to share with others, and no one can disturb you.

How to Get Your Own VPS

Getting a VPS is easy:

Step 1: Find a VPS Provider

Think of this like finding a store where you can buy things. There are many stores, and they all have different things to offer.

Step 2: Choose Your VPS Plan

This is like picking what you want to buy. VPS plans come in different sizes, like small, medium, and large. You can choose the one that’s best for you and your budget.

Step 3: Set Up Your VPS

Once you’ve chosen your plan, the store will help you set up your VPS. It’s like having someone show you how to use a new toy. They’ll make sure everything is ready for you.

Step 4: Make It Yours

Now, you can make your space on the internet your own. You can add things to it, like making your room cozy with your favorite things. It’s easy to use, and you don’t need to be a computer expert.

Real-Life Uses of VPS

You might wonder if VPS is only for websites. It’s not! Just like you can do different things in your room, you can use VPS for many things:

1. Web Development: If you want to build things on the internet, VPS is like your playground. You can experiment and learn without any problems.

2. Small Businesses: If you have a small business, VPS can help you have a professional website and email.

3. Online Stores: If you sell things online, VPS can make sure your store runs smoothly, even when many people visit.

4. Data Storage: If you need a safe place for your important files, VPS can be your digital locker.

5. Gaming: If you love playing games, VPS can help you have a smooth gaming experience.

6. Blogging: If you like writing on the internet, VPS can make sure your blog is fast and safe.

What’s Next for VPS?

VPS is always improving, just like technology keeps getting better. Here’s what might happen in the future:

1. Even Faster: VPS will become even faster, so things on the internet happen in the blink of an eye.

2. Easier to Use: Setting up and using VPS will be simpler, so you don’t need to be a computer expert.

3. More Possibilities: VPS will let you do even more exciting things on the internet. It’s like discovering new games to play.

In Conclusion: Start Your VPS Journey

Virtual Private Servers (VPS) are like having your own special place on the internet. It’s not just for experts; it’s for everyone who wants the internet to be fast, safe, and easy. Whether you run a business, want to learn about the internet, or just want a better online experience, VPS can help. So, start your journey with VPS today, and make the most of your time on the internet. It’s your space to enjoy!